Sunday, May 26, 2019

Sasayakko: In The Race To Relax

In 2004, not long after I'd moved to Philadelphia, I'd been invited to a gaming group in North Philly.  Not knowing what to expect, I'd arrived to a VFW building with about 60-odd gamers. I knew a total of nobody+1, so I walked around and casually introduced myself to each table. Most of the RPG's we're closed & in mid-story and the other tables were mid-tournament where sign-ups were weeks in advance.

Eager to geek-out but clearly side-lined, I meandered back to person who'd invited me.  A handful of other "no room at the inn" gamers had also gathered around him. So he suggested we play Puerto Rico by Rio Grande Games.

It had been the first time I'd enjoyed a game that wasn't either an RPG or one of the pixelated variety.  I bought my own copy, introduced it to my family, and found myself re-invigorated with a gaming revolution that happened under my nose: a resurgence of great board games.

My wife recently picked up Tokaido - a competitive game to see who can vacation the hardest.  She'd grabbed an expansion and got a bonus figure: Sasayakko, the geisha.

Hinamatsu was in my "to be painted" queue so I decided whatever color scheme my wife chose is what Hinamatsu would be getting as well.

My wife wasn't thrilled with the style and palette of the Sasayakko box art (what I dubbed "super-lavender").  I was relieved as trying to figure out how to paint a tiger that small would have been a challenge. So we circled through several geisha pictures until she chose a stock photo.


Sasayakko Color Scheme
  • Skin - Main Base: Mix of Reaper Tusk Ivory and Tanned Skin Highlight, Highlights: Tanned Skin Highlight, Shadow (Wash): FolkArt Barn Wood
  • Oshiroi face paint -  Main Base: Mix ofVallejo Heavy Heavy Warmgrey, Vallejo Ghost Grey, Dash of Reaper Tanned Highlight
  • Eyebrows - Thin Glaze of FolkArt Autumn Leaves, then a Thin Glaze of Cinnamon (thin glaze); Touch up with FolkArt Autumn Leaves (thin glaze) 
  • Undersash and Belt - Undercoat Base: Mix FolkArt Autumn Leaves and Reaper HD Entrail Pink, Shadow (Wash): Cinnamon around edges, Base: Heavy Glaze of Reaper HD Entrail Pink  Highlights: Reaper HD Entrail Pink mixed with Apple Barrel Antique White 
  • Back Undergarment - Base: Thin Glazes of Reaper HD Solid Blue
  • Main Dress - Base: FolkArt Aqua Wash, Shadow (Wash): Reaper HD Solid Blue , Highlights: FolkArt Aqua Wash mixed with Apple Barrel Antique White 
  • "Waves" in Main Dress - Base: FolkArt Buttercup, Shadow (Wash): FolkArt Ochre Yellow, Highlights: Vallejo Ghost White
  • Arm Drapes - Base: Reaper HD Twighlight Purple, Transitions: FolkArt Night Sky (glaze at top) to Reaper HD Gem Purple to Mix of Reaper HD Gem Purple and Apple Barrel Antique White


The eyes are always the toughest to do, so I've learned to start there. Experience has taught me to not get hung up on how war-like a figure will look in this stage, because filling in the face will soften all the "dirty tricks" to get them done.

Knowing very little about Japanese history and culture, I did a little research into the white face that the geisha strive to have.  It's appararently called kabuki make-up oshiroi (白粉), and it's also also what Kabuki players use.

Applications of base coats done .  Here I managed to get the little white dot in the eye that drove me crazy when I was trying to paint Sonnia.

First Glazes on Sash and layer 1 dress.  Originally started with Cinnamon on headpiece, but over time I realized gold would be a nice contrast.

Eyebrows were important here as most oshiroi I googled had this orange red style.

Most painting techniques for black hair tend to encourage you to start with a base coat of black and then highlight the tops of the hair charcoal grey - working up to a dove white for any strands that might gleam.  In the past I've done a heavy glaze of charcoal grey first and then heavy wash of black.  I also work dark blue in the undershadow where a gleam might pop out.

The moons and the arm drapes were just balls at this point.
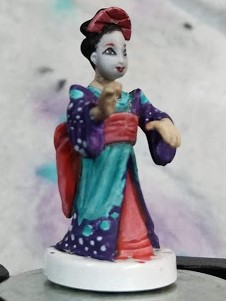
On the "globes", when you have to paint an exact shape like a perfect circle or a moon sliver, it's really challenging to make it look right at this small a level.  I've found it's easier to paint a simple shape and paint out the unnecessary stuff with the color of the background... than try to paint the shape itself.

Next up to paint was the blue and yellow "swatches" (I'm calling them this because they have a very "80's" shape and look to them.  Problem is they had no pop...

...and the key to give the pop was to outline with Antique White.

Final touches didn't do much.  Nuln Oil on Gold - not much of an effect.  Ran a little dark grey wash on the recesses.  I wanted to dull the recesses to produce a more realistic look.  But for some areas it just looked a little more dirty.

Lessons learned - I should have focused more on highlighting creases and mixing the original color for the washes to make the shadows blend better. 


Thursday, April 25, 2019

Stonehaven Dwarven Brewmaster: Have A Drink on Me...

So after all this talk about cask ale vs keg beer, it was time to paint a character who was clearly a brewer.

The very awesome Stonehaven Minis had a figure so well-suited, he became the character basis for the next Pathfinder game I played. Meet the Dwaren Brewmaster.  Have cask will travel...

So I'm still curious what the tool on his back not sure what it is but I think this is it. I'm going to call it a "brewing ladle" for now.

Brewmaster Color Scheme
  • Kegs - as per other post 
  • Skin - Reaper Tanned Skin palette for skin, with a little Reaper HD Sunburt Skin wash.
  • Apron - Base: FolkArt Butter Pecan, Shadow (Wash): FolkArt Walnut Brown, Highlights: FolkArt Linen 
  • Cuffs - Base: Vallejo Heavy Goldenbrown, Highlight: FolkArt Ochre Yellow
  • Shirt - Reaper Military Grey and Reaper Misty Grey for raised cuff
  • String Belt and Bands - Antique White
  • Pants - FolkArt Cafe Latte, dark brown wash (FolkArt Walnut Grey)
  • Shoes - Reaper Dusky Skin Highlight on tips and ankle, Reaper Dark Skin for mid foot, dark brown wash (FolkArt Walnut Grey)
  • Hair - originally going to do dark tones - but decided on Reaper Ash Grey, Cloudy Grey, and Misty Grey
  • Brewing Ladle - FolkArt Butter Pecan with dark brown wash
Beer Mug Color Scheme - all Heavy Glazes
  • Handle - Reaper Ghoul Skin and FolkArt Butter Pecan
  • Mug Edges - Reaper HD Tusk Ivory and Folk Art Sunflower
  • Mug Face, Bottom - Folk Art Ochre Yellow, washed over with Reaper Golden Brown
  • Mug Face, Middle - Reaper Golden Brown
  • Mug Face, Top - Reaper Dark Skin
  • Bubbles in Glass - Reaper Maiden Flesh
  • Foam - Reaper Maiden Flesh and Reaper Stark Naked, wash of Folk Art Sunflower, then Reaper Golden Brown / Dark Skin

Nice thing about the mini is he has a raised surface for the pupil of the left eye. Under my jeweler's glasses that I notice the same was not the case for the right eye.  Given the pose, I figured the figure was making a bit of a squint - which was a nice character touch.

As mentioned above, as I started painting on the tanned skin tones, I realized he just pops more with the white hair as a contrast.


First and second coats down, it was time to start the mug.

Darker yellow to show the transition (pardon the blurry photo)

Darker toward the top.

Too dark for a lager.  But why would a dwarf be drinking a lager anyway.  He should be drinking a stout.

Some final touches to make the foam look more like what a stout would be.


Here he is mounted on a base in the terraclips style wood floor. 


And - of course - I hid magnets on the base so I could drop things like a mini keg on his base - and take it off when needed. 


Thursday, April 18, 2019

...and Evil Casks: It's Classic! It's Ridiculous! It's Surreal!

My buddy AJ was with me in a gaming store when I picked up the Wizkids Kegs Barrels.  It was in the middle of a large display of other interesting figures from that line: wizards, ogres, theives, etc.

AJ, a fervent non-gamer, asked me why would I bother buying and painting a bunch of barrels. I picked up the Wizkids Mimic Set (which included a keg mimic) and said, "So I could use this."  He groaned and promptly left of the store, shaking his head. 

For the uninitiated, the mimic is an "object doppleganger". It's been around since the very first D&D Monster Manual and considered one of the most memorable monsters of the game.  Older gamers like me smile when we unexpectedly are bitten by one.

Why such a creature like this even exists gets a few different explanations:

1) The Insane Wizard 
The quintessential hand-waving explanation of fantasy gaming.  A long-forgotten wizard went mad and made a bizarre life form.

2) The Protective yet Morally Flexible Wizard
Another classic gaming explanation.  Wizard has macguffin.  Everyone wants macguffin.  Wizard hides macguffin in dungeon.  Wizard creates new multiple new life forms to protect macguffin.  And thus - the Dungeon in Dungeons and Dragons.

3) The Batman/Arkham Paradox 
The more attention Batman receives at putting mobsters in jail, the more he ends up inspiring villains as weird as himself to exist.  So the more popular adventuring becomes, the more a sub-ecosystem evolves to feed on them.

4) The "Scholarly" Lore 
Early Dragon magazines expanded on creature lore in articles called "The Ecology of..." The fourth article was on the mimic.  It had details on how it's capillaries would shift brown-pigmented fluid from its inner body to outer body, how it uses its pseudo-pods for movement, how it sensed others through patches of sensitive pigment.

The only thing missing was a companion article in the vein of People Magazine reading, "I didn't plan for a career on acting as a chest, I just sort of fell into it".

I grew up on "The Ecology of..." articles and loved the extra details.  It enriched the game for me, and inspired me to convert one of my first characters into a biologist-Dr. Frankenstein.

But in retrospect, there's a really obvious 5th reason why a creature like this exists.

5) The Game Master Wanted to Throw You a Curve Ball
My stepson pointed out an article by Aevee Bee that creatures like this exist because "They’re pretty nakedly nothing but a particular type of trouble or trap for people playing a game". The lore came after the fact, shaving the corners off the square peg to fit in the round hole.

Anyway... regardless of why the mimic is even exists... AJ's reaction also reminded me the mimic lives in that uncanny valley of comedy and horror I love - or more appropriately, bizarre and ridiculous.  It's a surreal nightmare where the the room literally comes alive in the worst kind of pun -- a pun that tries to eat you.

Perhaps gaming is more frought with ridiculously terrifying things than I give it credit for.

So the sculpt shows the keg mimic coming to life and I wanted the monster bits to have the appendages transforming to its non-chameleon state. 


Reaper HD Golden Yellow on eyes and straight black for pupils.  Reaper HD Burning Orange in the corners for effect.


For the teeth I used Vallejo Heavy Skintone, Vallejo Khaki, and Reaper HD Tusk Ivory.  Gums were Vallejo Night Blue.


Next to work on the tongue.  I originally highlighted with Misty Grey - which left the tongues too white.  So a wash of Reaper Ghoul Skin tones it down then a little Reaper Pale Olive to punch up the ridges.  Also dabbed a little Vallejo Heavy Skintone and Vallejo Khaki on the grey parts of the hoops to produce a mottled effect.

So painting experience on this one was pretty positive for a ridiculously terrifying result.

Thursday, April 11, 2019

Barrels and Casks...

"Real ale."

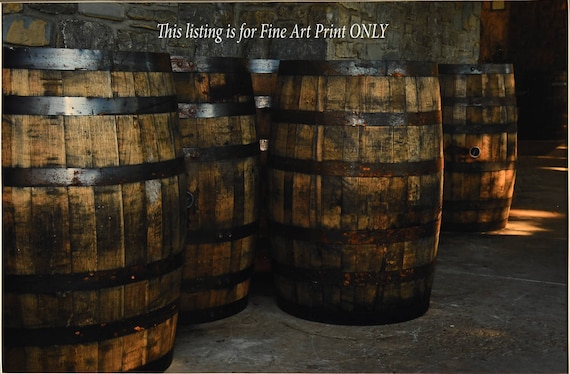
On my recent travels through the Finger Lakes, my wife and I came across a brewery called The Beerocracy. With I name like that, a tasting was mandatory.  I was familiar with English style ale so the samplings had a wonderfully warm tone and maltiness. Plus, the traditional English style pub added some apropos atmosphere.

The bartender proudly announced they were the only brewer of "real ale" in New York. At first, I thought was just snobbish bit of boasting. But I later learned it was another name for cask ale.

Around mid-20th century, aluminum kegs began replacing traditional wooden casks. This transition prompted cask-ale-lovers to sponsor the Campaign for Real Ale. And thus, cask ale was synonymous with real ale (or in the UK at least).

What's the fuss?  Well I might be used to it, but apparently keg beer is "fizzier". Modern brewing techniques keep beer under a "blanket" of carbon dioxide so oxygen never makes contact throughout fermentation process to the keg.  The carbon dioxide also gives keg beer its carbonation.  

But before keg beer, brewers didn't know how to kill the yeast after the primary fermentation process.  So cask ale was delivered "alive" (i.e. yeast alive and still making alcohol) to the pub where they had to store and handle it properly before tapping.  Cask ale is less effervescent than keg beer since no carbon dioxide is pumped into it.  But it tastes maltier and tastes as fresh as if poured at the brewery, i.e. "brewery fresh".

Ironically, I had been lucky enough to be gifted several miniature barrels for my birthday presents. But after lagging behind my painting sessions, it was time to get over myself and see if I could "knock it all out".  I looked on YouTube to find a nice and quick barrel painting tutorial.  Happily, I found How to Paint Wooden Barrels by "Watch It Paint It", which looks like it would result in something I liked.

I made the following substitutions borrowing a lot from my Vallejo NMM paint set:
  • Vallejo Charred Brown = FolkArt Teddy Bear Brown
  • Vallejo Leather Brown = Vallejo Heavy Brown
  • Vallejo Bronze Fleshtone = Vallejo Heavy Gold Brown
  • Zombicide Machine Metal = Vallejo Cold Grey
  • Zombicide Survivor Shader = Vallejo Black thinned down to a wash
For the stands on the kegs, I used FolkArt Coffee Bean.


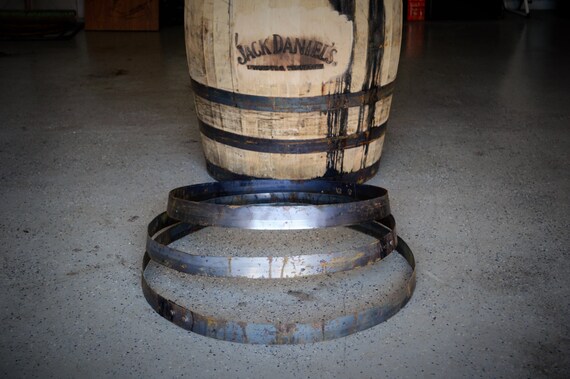
And of course, once I knocked all that out, I had something I liked... but could not leave alone.  I kept thinking the bands (which are called hoops) looked better when they were all black.  In my mind's eye, I guess what I imagined were beer barrels were closer to older barrels.  New ones have a shiny steel look, but I prefer an older "just rolled up out of the cellar" look.

The barrels on the left were probably made with a 3D printer.  It's my first time painting something made this way, and I felt many details were missing.  The paint slips in between the cracks of the plastic "tubes" with brush painting.  I think an airbrush would work a lot better with these.

More on the thing in the middle on the next post.

On the subject of corks... I always love having terrain that a mini can stand on.  So I drilled a small hole in the top of each of the kegs, and glued in a magnet.  That will be our cork.

Barrel/Cask Color Scheme
  • Hoop - Reaper HD Armor Grey, Edges Reaper HD Ash Grey
  • Lower Hoop Areas - Dusky Skin Shadow, Dark Skin Shadow, Vallejo Black 
  • Gleam transition - Reaper HD Ash Grey, Reaper Cloudy Grey, touch of Vallejo Turquoise or Reaper Misty Grey
  • Cork  - FolkArt Butter Pecan Base with heavy Reaper HD Golden Brown glaze, Reaper Dark Skin Shadow border with Fair Skin and Bloodless Skin Highlights (more on this)

Zooming in on cork you see a "flaky" pattern that I wanted to replicate.  Being the magnets are so small, I thought the best method would be to layer the dark up to the light - rather than base with wash and borders painted on.

That of course makes this first pic a complete lie because it's so washed out the color is too bright.  But keep my theory in mind.  I'm still on the fence as to whether I should have stopped at #2.
1) Butter Pecan Base.  On the top one you can see I started adding the Dark Skin Shadow to get the cork texture.

2) Heavy Glaze of HD Golden Brown, and then add more cork texture (Dark Skin Shadow)
3) paint in the highlight (Fair/Bloodless Skin) inside the border

The lighter colors were too bright for the color scheme I was going for.

Anyway...  Next I really wanted to recreate the hoop gleam from my main picture reference.  There's a touch of blue in some of the gleam which I used the Turquoise from NMM.  Newer barrels don't seem to have that color in hoop.  Older hoops seem to have that variance in color.

In this starting pic, you can see the where I had the shadows beginning with a heavy glaze of the Darker Skin tones to delineate where the transitions would be.


Brown added below the middle of the hoop to show where the shadow begins.

Just above the shadow line, I used Reaper Cloudy Grey and Misty Grey for strongest highlight and  Heavy Glaze of Vallejo Turquoise to get the metal gleam right.

A little heavy glaze of Reaper Armor Grey around the gleam to smooth the transition.

The painting experience on this was a little frustrating due to the 3D printed stuff not taking the paint too well.  Even when completed, you can see bits that stick out compared to the D&D ones which made from a mold. That said, getting practice on the metallic "gleam" was good experience.


This seems like a lot of time on the style for barrels and casks. Part of all this work is to hopefully get better at knocking this stuff out quickly.  Mastering the little details hopefully builds talent. But there's another reason. In fact, someone once asked me this very question...

Thursday, March 28, 2019

Slop Haulers: Lob Food and Heal Up

One of the biggest challenges in gaming is balancing the realism with abstraction. Too much realism devolves into rule-heavy slog-fests.  Heavy abstraction bears fruit much faster - you get right to the fun of the game.  But over time, its all the same repetitive blocky shape and reality gives way to loopholes.

Let's focus on heavy abstraction and how its used to represent "getting hurt" and "getting better".

The most common measuring stick for getting hurt is the hit point system.  Healing comes from different sources. Fantasy games usually lean on clerics with godly spells.  Modern and sci-fi games may lean on devices like a stimpack which may soon have a real life equivalent. 

But both types usually have a fascination with food where the abstraction gives way to the loophole.  Eating an apple could arguably heal a hit point or two.  But why would a bushel of apples in one sitting become nigh magical healing devices?

It's not like this is relegated to a few games -- this is a weirdly popular mechanic.  The near-dead character stumbles away victorious from the boss battle to open a chest with a chicken dinner in it, which fully restores all health.  Or mid battle, the gamer can live pause to rifle through inventory to eat an apple.  OK sure - eating properly aids the healing process, but only with proper rest.  If I've been shot in the leg, pigging out on power bars isn't going to make the wound close.  

I've been reflecting on all this when looking at Malifaux's slop haulers, and wondering if they creative team at Wyrd have decided the loophole is great source of comedy.  Slop Haulers are gremlins that haul buckets of vegetable matter and swill around so they can be tossed onto fellow pigs (and gremlins).  To heal them.  In mid-battle. We've gone full-in on the next level of abstraction: you don't even have to stop and eat - just get slathered in tossed vegetable matter. 

Though admittedly, it's tonally accurate for the Gremlin faction...

So onto the figures themselves.  The expressions on these two poor saps look like they are shouldering the unsung hero spot of any gremlin crew.  I'm going to make it clear they are trudging through the swampy mud to keep their allies going.

Pig feed doesn't look like green slop to me.  Wet yes - but it should be made of grains and oats and the like.  So I'm going for a "mash" look.  But it needs to be wet too.  Sounds kind of gross.  So a great reference would be the most disgusting school lunches in the world.  Done.  Reaper's Palomino Gold and Khaki Triad would work well but I'm going to sprinkle in some FolkArt equivalents.

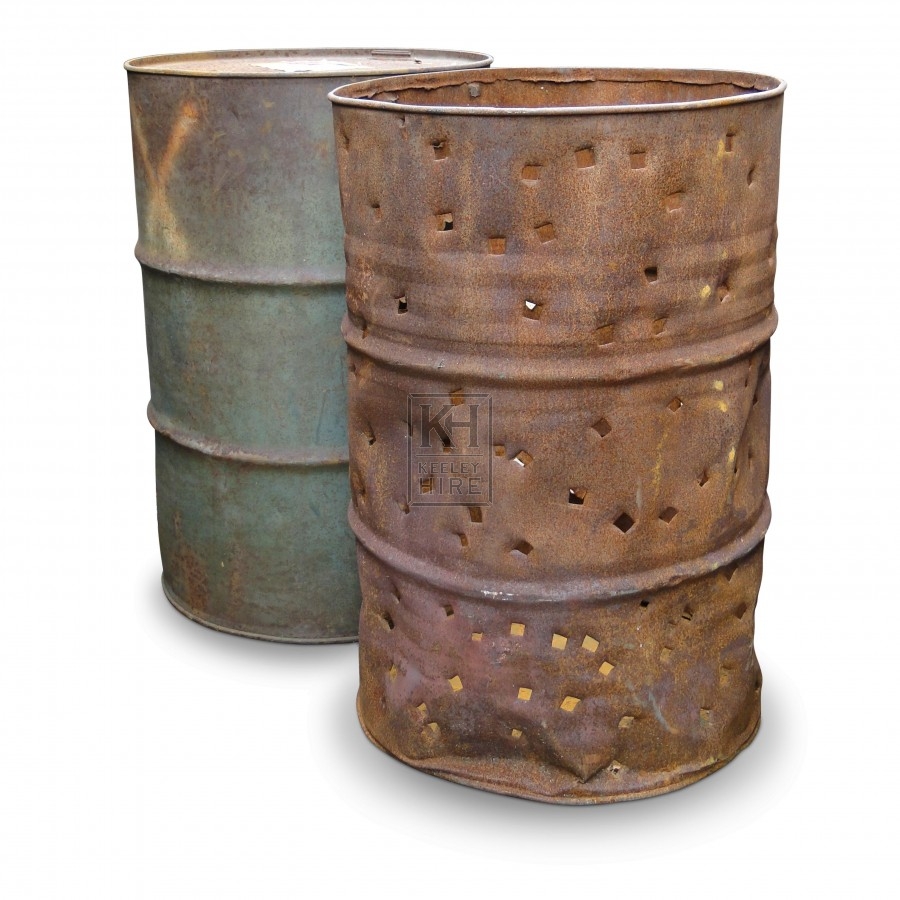
As to the second hauler (without the hat), he seems to be carrying an oil drum.  Where they got oil drums in Malifaux, who knows.  But let's make the most of it.  I wanted to avoid modern colors and thought this one in the background was closest to a Victorian color palette while still looking old.

Slop Hauler Color Scheme
  • Skin - Base: Reaper Fair Skin and Reaper Worn Olive, Shadow (Wash): Reaper Worn Olive, Highlights: Reaper Moldy Skin 
  • Shirt -  Base: Reaper Concrete Grey, Shadow (Wash): Reaper Moldy Skin, Highlights: Reaper Bloodless Skin
  • Gloves - Reaper Darker Greys
  • Buckets - Base: Ceramcoat Autumn Brown, Shadow (wash): Ceramcoat Cinnamon
  • Hat and Pants -  Base: Reaper Ashen Brown, Shadow (Wash): Ceramcoat Dark Forest Green 
  • Old Oil Drum - Base: Apple Barrel Wedgewood Green and Reaper Ashen Brown glaze, Highlights: Reaper Dusky Skin Highlight and Wedgewood, Reaper Ruddy Brown toward rims
  • Pig Slop -  Base: FolkArt Ochre Yellow Shadow (Wash): FolkArt Honeycomb wash, golden brown shadows, Wet Blend: pools of Folk Art Fawn, Reaper Tusk Ivory 
  • Leather -  Base: FolkArt English Mustard, Shadow (Wash): FolkArt Walnut Brown glaze
  • Suspenders -  Base: Reaper Military Grey
  • Muddy Bits -   Shadow (Wash): Ceramcoat Autumn Brown
Being that these guys traipse through the mud weighed down with containers of swill, I didn't pin the mini down like I normally would. Instead I used my spackle (for mud), made the impressions of their feet into the base, solidified the spackle with some watered down white glue, and then super-glued them right on. 

Slop Hauler 1 didn't need a lot of green stuff.  I glued the one bucket to his elbow.  I didn't have the same options with the other one (which I would regret later).

When ever you have two hands that meet together, you are sure to run into a lot of gaps.  This was no exception as his left shoulder looked like it had been dislocated.  Serious scultping work and sanding.

Priming used Army Painter's Uniform Grey, then black wash and drybrush white.  This is where craft paints normally work better for me - as the "dry part" usually easier to get.  But I got it too wet and got this mess.   Worse yet, the drybrushing sheared the other bucket right off the mini.  A lot of swearing this night.

Weird detail - on the right you can see this gremlin is not wearing a knit cap.  He's wearing a doo-rag as evidenced by the flap of material under his carrying stick.

Stoopid bucket.


Here on Slop Hauler 2 you can really see where the white drybrush should have been dryer.  Still - a little more black wash helps.  Not unfixable.


First coats on Slop Hauler 1...

...and his stoopid bucket.


In progress shot of #2 with the straps unpainted.

Slop Hauler one with washes completed.


Slop Hauler 2 with washes completed.


A few notes about the oil drum.  Considering the Malifaux setting is supposed to be late 1800's / early 1900's, a gremlin carrying on oil drum is a serious anachronism.  Why the sculptor didn't decide to use an actual wooden barrel...  

Anyway, color scheme... Black would blend in. Blue would clash. Thought green would be to similar to the skin tone... Until I found a good reference for a weathered oil drum.  Then I was in on it.


Past experience says once a thin plastic piece has snapped, it's just a matter of time before it breaks again, especially when you're manually moving it along a game board.  So I a made little hot glue strand to support the reattachment of the bucket.  Some tuft pieces will do it's job on hiding it.  But first...


... making the base look like wet, goopy mud.  I just added some Vallejo's liquid water to the base,  being careful not to get directly on the feet


A little heavy glaze of mud color (Ceramcoat Autumn Brown) on the feet and a tiny bit of mud spatter. Then hide that hot glue support with a tuft of grass.


While painting the figures while on the base saved me the aggravation of having to put pins in those tiny gremlin feet, my thumbs unfortunately wore away at the bases.