Showing posts with label miniGirl. Show all posts

Tuesday, January 5, 2016

The Hanging Tree 1: Framing It Up

So in Malifaux, the Hanging Tree is an iconic landmark to warn visitors and immigrants to obey the law or dangle from a rope. It's the third thing travelers on the train see before pulling into the Malifaux. There's a cool official mini that Wyrd sells on holidays, and I've always been tempted to buy it, but the price tag is a big turn-off.
Since I've been reading more terrain blogs and watching some videos, that cost-effective voice perks up and says, "I could do this myself."
So here goes my Xmas 2015 experiment.
I'd kept and old extension cord ever since I saw this YouTube video on making wire frames for miniature trees.  So one game session I stripped it and made a tree with one long arm perfect for a rope to throw around.

Knowing I had to apply wood filler, I applied some masking tape so it had something to stick to.  Here's a shot of the the taped up frame with some putty applied to the trunk. 


I'd tried some white wood filler from a tube on another mini but nothing got the wood feel quite like this stuff from Elmers. It's pretty amazing how little you have to apply. But you really need to make sure you get some watered down PVA glue or wood glue to harden it up after it dries.  It crumbles really easily and moving it around is a mistake.

Slowly adding filler up the branches...

Filler progressing up the tree.

At this point, I realized some of those branch ends had to go.  Time to trim them up.

As to the base, I added some spackle to get a simple impression of the trees underside.  Spackle works for that dirt feel (though like the wood filler, it needs some watered down PVA glue to harden it up).


The Hanging' Tree sits by the entryway to the city so I wanted to get some city cobblestone underneath - to get that  impression this evil tree is bursting up over the city, unable to be subjugated. The green stuff was used for  cobblestone  (once again, using miniGirl's template). Spackle was used for the dirt.
Applied my Terraclips City color scheme, and some Burnt Umber for the dirt color.
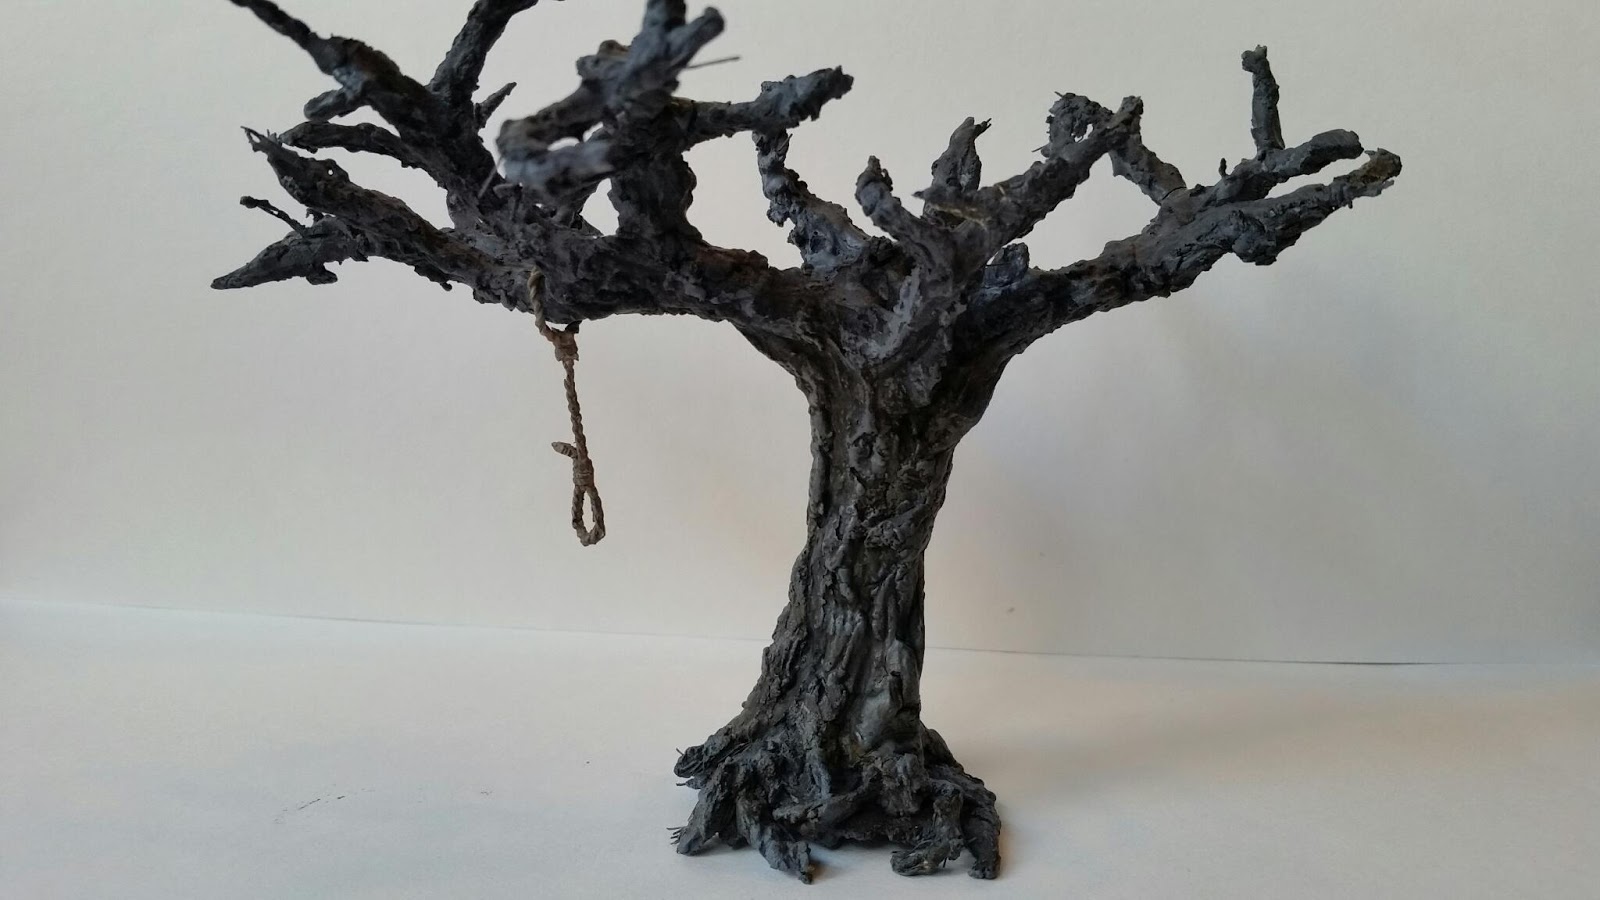
Had to break to hangman's rope into two sections: the rope around the tree and the noose. For the noose, I used "InstaMold" to copy the noose from the Malifaux Bayou Accessories pack.For the rope, I straightened two paper clips and then twisted them together to create the rope hanging from the branch.

I primed the whole tree section with Army Painter Uniform Grey, and did a little black wash but I decided against drybrushing white.  Most dead trees seem to have a strong grey hue so muting that as the undercoat I felt would undo a good start.  The rope I gave a light brown coat - combining Linen and Coffee Bean (FolkArt).
I eventually decided on using Reaper's Ashen Brown from their HD line as the main coat. Its a very muted brown with a hint of purple to warm it up a little. I watered it down to a thing glaze and gave two coats. The first went everyehere. The second was more selective, leaving some if the knot holes untouched for the grey to come through.

More to come.

Wednesday, December 31, 2014

Teddy 5: Pinning and other nuisances

I'd pickend up some Tamiya Clear Red as I'd read that was the best way to get some gory blood reds... And I really liked the effect that Klatu.org got on his Teddy.   But after going through all this work to get the badge, teeth, and lips right - dumping another set of colors overtop of what I've done made me very nervous.  If it didn't go on right, there was no way for me to fix it with out starting from scratch.

I threw some on some test skeletons (from Reaper's first Bones set), and was not thrilled with the results. Examples I've read from other painters had all these shades that fresh blood has.  Whereas what I did just looked like... paint.  I obviously needed more time to experiment with this style.

I ran the idea past my family. They convinced me that blood coming out of Teddy's mouth was too over the top.  Given my hesitancy, it wasn't hard to convince me.

That meant it was pinning time!  I hadn't yet glued the insert to the base, but I wanted to make sure the holes were in the right spots. So I pre-drilled some holes in the orphanage base and simultaneously the base itself.  (I would later come to regret doing this.) 

I also shaved some more metal off the pads of Teddy's feet to get him to stand flatter, and headed over to my buddy's house for a night of painting. I figured I'd knock the gluing and pinning process in an hour or less and get to finishing my Stitched Together models.

Upon arriving, I picked up my painting bag, it slipped and I cut open my forefinger with my thumbnail. (I still am unclear how I pulled this accident off.) I started getting real blood on the pentagram that was conjuring Teddy.  A little foreboding...


The gluing process didn't go smooth.  I struggled to get the holes in the base lined up with the orphanage insert before the glue dried.  I eventually used a rubber cement which gave me a little time to do the lining up.  When I finally got that I put Teddy in and tried using extra long pins and bending underneath the base to give the mini more stability.  (NOTE: I got this idea from the very informative HobbyGuy / MiniGirl #36 blog, though it looks like this episode has been taken down.)

But I didn't route out the plastic lips under the base like I normally do when I put my washers underneath. So I couldn't get a clear 45° angle to bend the pins. I ended up putting more elbow grease in and pulled the pins put of Teddy completely. And I scratched the paint off some of the boards. And more blood got on the summoning stone.

So I had to pull the pins out, recut them, and superglue them back into Ted.  This also meant that using green epoxy for extra stability was unavoidable at this point. It would be needed just where the pin was coming out of Teddy and under the base.  The end result was Teddy's feet would not hit the floor flatly. He's sort of levitating there above the summoning stone.  At this point, I called it a night.

Saturday, November 15, 2014

The Zoraida Proxy Part 1: Murlocs for Silurids

I had just finished painting the Perdita crew and was painting Seamus crew, with Marcus on deck for the distant future.  I really wanted to try another crew, but at the rate I finish  painting figures, I just knew it would be another box sitting in my drawer for at least a year. So I started looking at the minis I had, and realized I could probably proxy in a Zoraida crew.

First, I subbed the silurids with murlocs.  I had a bunch of pretty awesome plastic figures from the WOW board game.  I'd painted these back when I was exclusively using Games Workshop paints, didn't care too much about extensive basing, and hadn't discovered de-glosser.  

I proxied them for a  Malifaux game vs gremlins. While I won, I realized the bases were less than 30 mm which really shortchanged the silurid movement abilities. Also this is some of the first bases I ever worked on... and I knew I could do much better today.

Grabbing some of the ones where the paint job was a little better, I grabbed some 30 mm bases, put down a green epoxy base. Terraclips Streets tends to be my default terrain, so I wanted to put a little cobblestone in the marsh to give it a slight transition - sort of as if the swamp had taken over an abandoned section of the city.  I now use a template I got from miniGIRL for almost all my cobblestone bases.
NOTE: Got a little too much Vallejo Still Water on this purple guy as it was my first attempt using the product. The scotch tape around the base doesn't work if you have a rounded lip.  It just leaks out everywhere.

The disadvantage of plastic minis is definitely flash lines.  They are a pain to remove, easy to destroy fine details by using too much force, and nigh impossible to resculpt.  The advantage is small leg/hand adjustments after the figures have been painted.

Each murloc has this "sumo wrestler" stance that looks funny and not very threatening when a group of them are set side by side. I found the best way to vary up the positions was to make one leg go back to make it look like it was running.  The bent leg will slowly bend back to its original position but it is possible to get the position you want.  It's all up to the placement and angle of your pin, overbending when ready and super-gluing to the base before it bends back.  Testing hole placement before gluing is key.  The pin for this guy ended up being in the balls of the toes for one of the feet.  Once I got the holes drilled in the base, I would overbend the leg and quickly superglue it until I got the position right.  And I glued one of his arms to his knee...
And this blue murloc, I'm pretty sure I put the pin in one of his toes.  He really looks like he's in mid-leap.